Ants are passionate because of their social lifestyle, their endless activity and their behaviours. It is therefore quite naturally that I wanted to observe them more closely and to raise some at home.
I was therefore interested in the existing techniques and possibilities to make an artificial anthill. It is not a question of leaving at random, a minimum of knowledge on the biology, ecology, physiology of these insects is necessary.
This part will be devoted to the manufacture of an anthill, to know more about the biology, ecology and physiology of ants, you must follow this link : here.
I am, of course, at your disposal for any questions, requests for advice, tips and/or expertise. Do not hesitate to contact me here. Looking forward to reading and helping you!
How to make and have an ant farm at home?
Many materials can be used depending on ant species, desired aesthetics and ease of manufacture. In all cases, the nest must meet a certain specification. It must offer conditions of humidity, temperature and resist the mandibles of ants (some species have the ability to dig very hard materials). It is therefore possible to build nests in wood, earth, plaster, Plexiglas or cellular concrete.
For my part, I prefer cellular concrete for the following reasons:
- its porosity, which allows it to absorb water by capillarity, while remaining resistant (unlike plaster which tends to disintegrate with time),
- its particularly brittle structure allows it to be easily dug with a screwdriver or a milling machine (the plaster is molded),
- its inorganic composition that limits the development of fungi and mites unlike wood or soil,
- its resistance for transport
Steps:
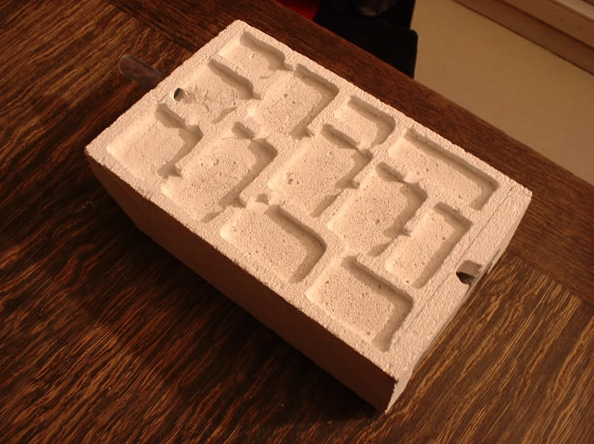
caption id=”attachment_741″ align=”alignright” width=”150″] Concrete block dug with an electric milling machine[/caption]
1) – Take a block of aerated concrete, the volume of which depends on the size of the ants (some species measure 1 to 2 mm and others exceed one centimetre) and the number of ants you wish to have in your colony. More space is needed for the colony to develop. Indeed, ants support a high density, up to a threshold where the queen stops laying eggs until the population decreases and finds an acceptable threshold.
2) – Dig galleries and chambers that will accommodate ants, similarly, the depth and width must be related to the number and size of the species. An electric milling machine is the most practical and easy to use (see photo).
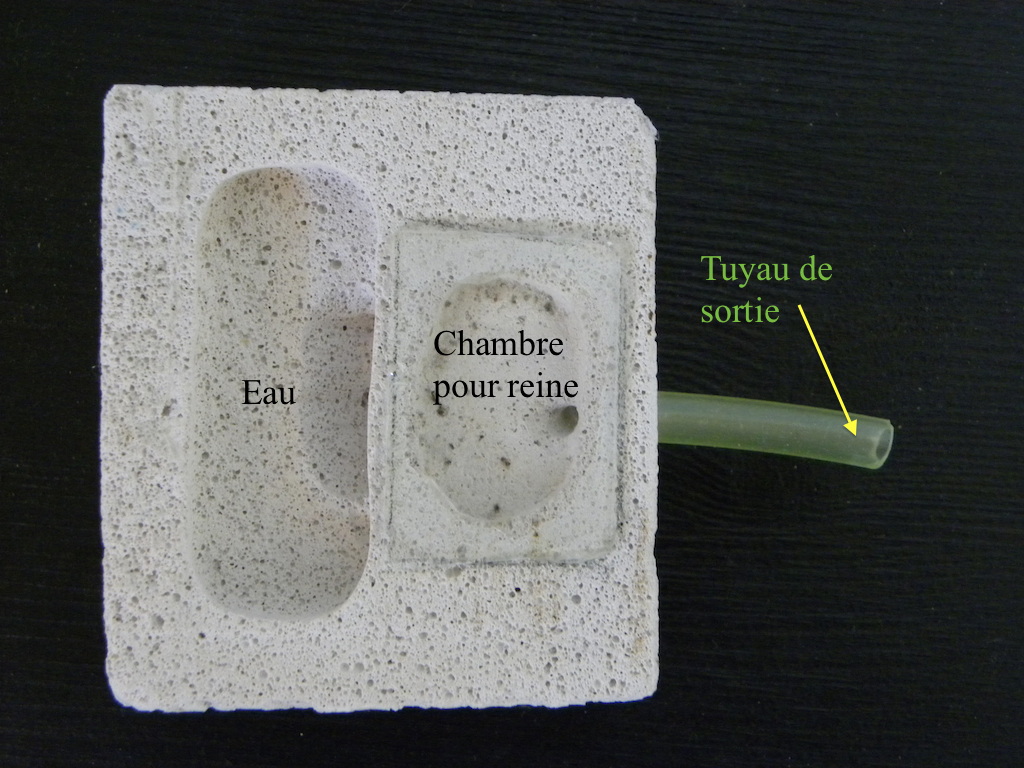
3) – The humidification system, important because ants need moisture, some species more than others. It is best to have a gradient of humidity in the nest, so the ants place themselves in the place that suits them best. Either the humidification is done from the bottom of the nest, the water rises in the cellular concrete by capillarity, or from above the nest. In the first case, it involves digging a part of the cellular concrete so that it can be immersed in a container (see photo). In the second, it is enough to dig a chamber where the water will be poured. Its surface must not be in direct contact with a chamber containing ants. The water will propagate in the cellular concrete and humidify the nest according to a gradient (see photo). For my part, I use the second technique that I find more practical.
caption id=”attachment_744″ align=”alignleft” width=”278″] Water tank and chambers with ants – ©Photo B. GILLES[/caption]

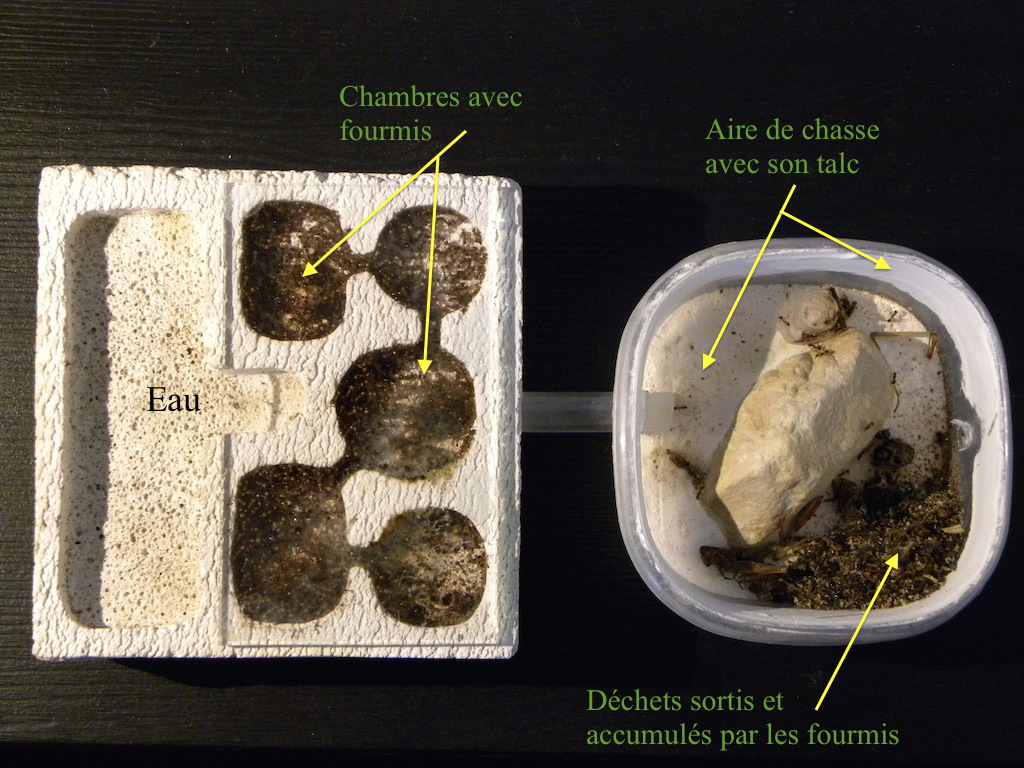
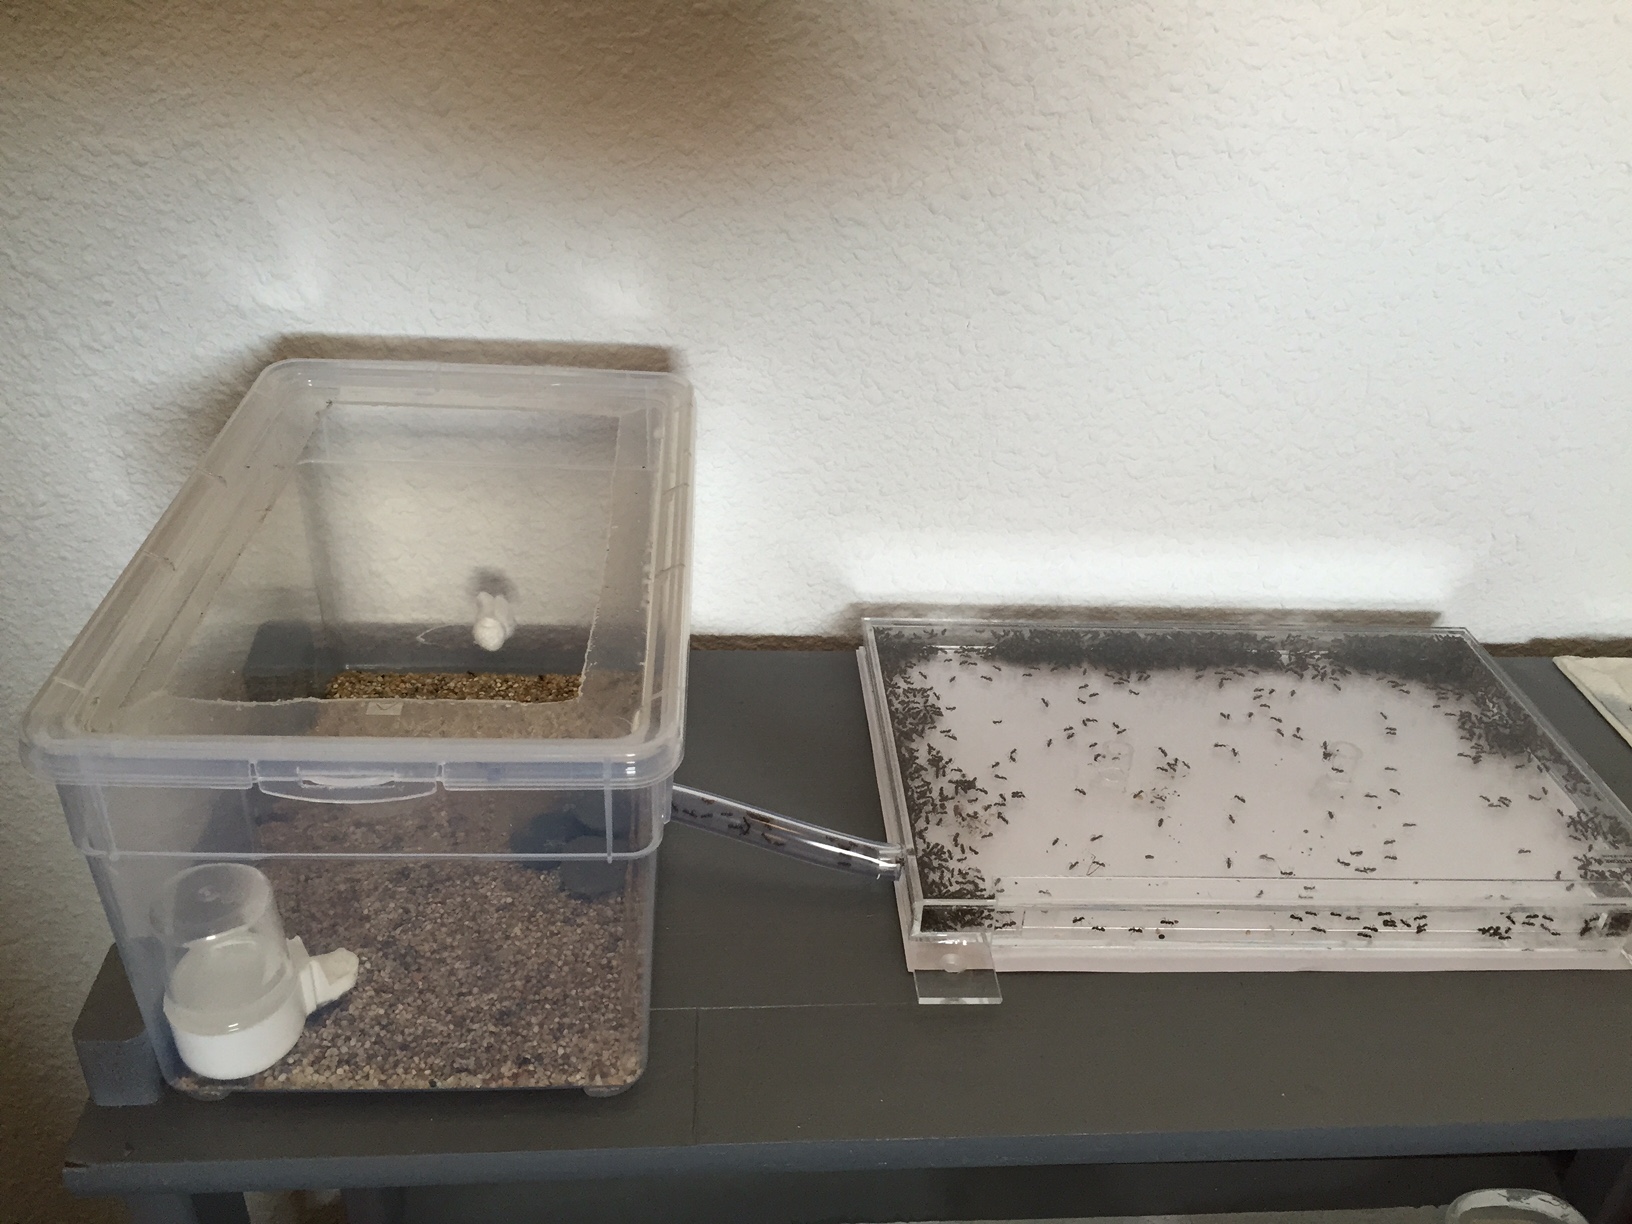
4) – Insert the hunting area (place where ants will be fed and where they will evacuate the waste) whose goal is to offer an open space where ants will be able to come to feed and evacuate the waste. The hunting area is most often a plastic bin decorated with sand, plaster, earth… (whatever we want!) that creates an environment where ants will evolve. The hunting area can either be incorporated into the nest or be independent. This consists in making an opening on the bottom of the container which gives into a nest chamber in case 1 or in connecting the hunting area to the nest by a plastic pipe (see photo). I prefer this second option because the hunting area and the nest are independent, it is easier to transport the nest, and it is also possible to change one or the other of the elements afterwards.
5) – Place a glass plate on the aerated concrete, which allows both to prevent ants from coming out and to observe them without disturbing them. To glue the glass plate to the aerated concrete, I use an all-material quick fix adhesive. Nothing very complicated in this step.
6) – Place talcum on the upper edges of the hunting area to prevent ants from leaking (see photo). Ants can’t hold on to talcum powder and slip. However, this step is more delicate, more complicated and requires a little practice. The technique is to mix talc with 90% alcohol, so as to obtain a mixture that is not too thick or too liquid, to position the hunting pan upside down, then to pour the mixture. Make sure that no space is forgotten, ants quickly find the fault! Wait for the alcohol to evaporate and the talcum powder to dry, that’s it. It may be useful to test with small containers and wild ants to learn the technique.
Where to get colonies? How to feed them? Which species to choose
?
Many possibilities exist:
To discover this step, follow this link.
I am, of course, at your disposal for any questions, requests for advice, tips and/or expertise. Do not hesitate to contact me here. Looking forward to reading and helping you!
I suggest you visit this site : myrmecofourmis.org, a site and forum dedicated to Myrmecology (science of ants), you can find all the information concerning the breeding of ants and exchange with other enthusiasts.