Building an insect collection involves following a specific protocol, methods and materials for collecting insects and related data, displaying specimens, determining species and canning. This article, the precedents and the following are therefore intended to present how I proceed.
How to collect insects?
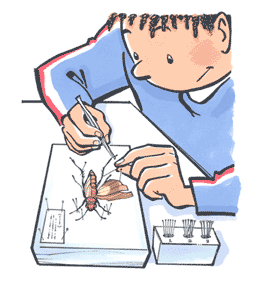
Once the insects have been captured (see th article) and prepared (see here), it is a matter of labelling them, determining them (species name) and placing them in insect boxes. The collection is very important, it allows to give a scientific character to the collection, without that, the collection can only have a decorative role.
1) – Labelling :
caption id=”attachment_913″ align=”alignright” width=”176″] Labelling of an insect (Source : CIRAD – A. FRANCK)[/caption]
This step consists of recording all the information related to each insect collected on labels that will be pinned under the insect. These labels must be standardized to give a homogeneous appearance to the collection and the size adapted to each insect. They can be written either by hand or by text processing. The second option allows you to obtain small, clearly legible writings.
It must be written on the labels:
- The locality of capture (city, place, country, GPS point)
- The name of the collector
- The name of the determinator (the one who identified the species name)
- The Latin name of the specimen (genus and species)
The date of harvest (ex: 10 IX 2014), the months in Roman numeral to avoid confusion between day and month
Also, other information may appear such as sex, capture method, host plant name, weather conditions, ecological environment… This information can be found either on the labels (limited space) or on a hunting log. In this second case, put a reference number to make the link with the specimen.
All these data cannot appear on a label, it is possible to distribute them on 2, see 3 labels ( see illustration opposite).
2) – Position in the collection

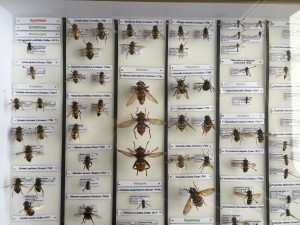
The insects, once labelled and determined (see this article), will be able to be arranged and classified in boxes (boxes) provided for this purpose. Classification must be methodical and orderly in order to find and compare insects later. The classification is based on the current classification, that is, by Order, Family, Sub-Family, Gender and Species. For better organization, the inside of the boxes will be divided vertically, using string or thin strips of paper, into several parts (4 to 8 depending on the size of the insects) where the insects will be installed from left to right. Labels indicating the place in the classification will be placed in these columns (see photo opposite).
Following, the collection boxes will be stored vertically on shelves or in cabinets. For ease of use, glass insect boxes are recommended and each box will be labelled with its contents (Family, Sub-Family and/or gender).
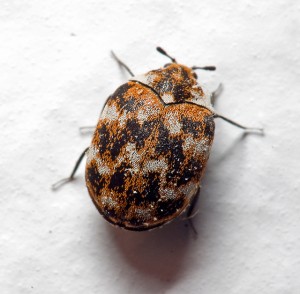
Caution: The room where the collection boxes are stored should be as dry as possible. Moisture allows the development of mould (white down on insects) and insects such as anthers (Beetles of the genus Anthrenus sp.) (see photos) that feed on dead insects. To prevent the invasion of these collection pests, several techniques exist, some more harmful than others, such as beech creosote (carcinogenic and now banned) or paradichlorobenzene (less harmful). The best technique remains the freezing of the boxes. What I advise, is to place the boxes in the freezer 2 to 3 days from time to time to prevent any infestation.
I led a mission to modernize and digitize the entomological collection of INRA Orléans. During this mission, I classified and arranged a large number of specimens from over 80 years of sampling throughout France and the world. For more information, I invite you to read this article.


I am, of course, at your disposal for any questions, requests for advice, tips and/or expertise. Do not hesitate to contact me here. Looking forward to reading and helping you!


